The Art of VFX » THOR: Jonathan Harb – VFX Supervisor & Founder – Whiskytree


We used Softimage to create all the 3D elements, and rendered with Arnold. Employing Arnold in this show was one of the best decisions we made for the show, and it allowed us to render with all of the expensive calculations such as GI, glossy reflection, and 3D motion blur, without costing too much render time. Additionally, all the effects work such as cloud/myst, flags/banners, water, and crowds were done with ICE in Softimage, and these libraries of effects also helped toward recycling for use in other shots. Also, while we originally planned to replace all of the CG cliff renders with image-based projections at the end, the sophisticated lighting and quality of the Arnold renders allowed for only about 10% of touch-up painting in the end.

via The Art of VFX » THOR: Jonathan Harb – VFX Supervisor & Founder – Whiskytree.
The case of the Filter node that didn’t work


In this case, the customer reported that the Filter node didn’t seem to work consistently. In the scene I examined, it seemed to be a problem with the construction stack: for some reason, the ICE tree operator wasn’t being pulled (evaluated). Here’s a quick walkthrough of the investigation 😉

http://vimeo.com/25620343

I looked a little deeper into this case, using GetConnectionStackInfo, and I found that somehow the ICETree operator was below the cluster ops:

// INFO : Objects that read from the primitive:
// matchstick.polymsh.secondaryshapemarker
// matchstick.polymsh.animationmarker
// matchstick.polymsh.shapemarker
// matchstick.polymsh.modelingmarker
// matchstick.polymsh.cls.pnt.clslist.Point.AddToClsOp
// matchstick.polymsh.cls.pnt.default_Point.SetClsFromICEOp
// matchstick.polymsh.Init_ICETree

If I created another ICETree op and moved it below (after) the original ICETree op, then the ICETree operator would have access to the cluster:

ApplyOp("ICETree", "matchstick.polymsh", siNode, null, null, 0);
MoveOperatorAfter("matchstick.polymsh", "matchstick.polymsh.Init_ICETree", "matchstick.polymsh.ICETree");
DeleteObj("matchstick.polymsh.ICETree");

// INFO : Objects that read from the Sphere primitive:
// matchstick.polymsh.secondaryshapemarker
// matchstick.polymsh.animationmarker
// matchstick.polymsh.shapemarker
// matchstick.polymsh.modelingmarker
// matchstick.polymsh.Init_ICETree
// matchstick.polymsh.cls.pnt.clslist.Point.AddToClsOp
// matchstick.polymsh.cls.pnt.default_Point.SetClsFromICEOp

Building Lagoa ICE trees from scratch


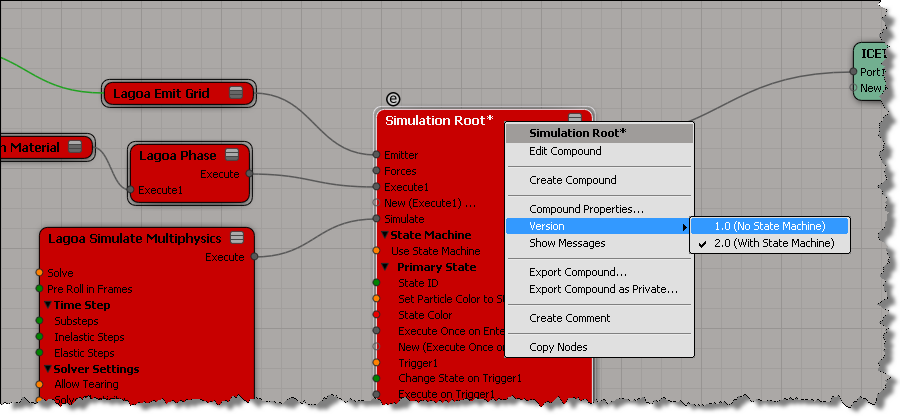
If you’re trying to build a Lagoa effect from scratch, as described here, you may hit a little gotcha:

If you look into the Lagao presets, you’ll see that they get around this by using a simplified version of the Simulation Root:

You can import this compound from here:
$XSI_HOME\Addons\ICEFlowBuilder\Data\Compounds\Particles\Simulation Root.xsicompound

UPDATE: In the comments, Guillaume points out that you can simply right-click the Simulation Root node to change versions:

Friday Flashback #24


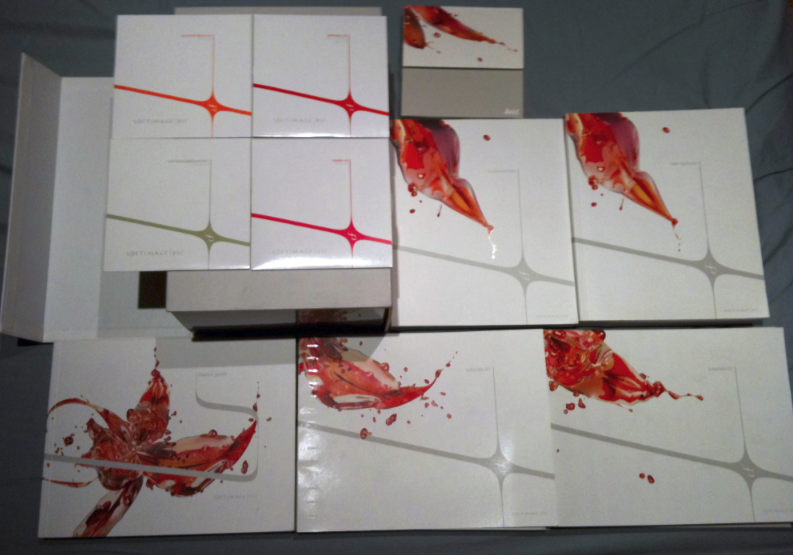
The “XSI flower” was a graphic design element used with releases 4.0 and 5.0.

I call it the “flower” because I found it in a folder named “XSI_FLOWER”. It appears to have been done in Photoshop (there was a .PSD file there) and this JPG:

UPDATES:
Thanks to Hirazi Blue (in the comments) and takita (XSI list) for pointing out that the flower logo was created by me company using Softimage|XSI itself.

In the comments, Hirazi also mentions that:

There was a nice 5 page article specifically about this design in the August 2007, #93 issue of 3D World (pages 44-48).

So, I dug up (aka googled) some more info:

  • The cover page for the XSI 4.0 New Features document includes this:

    Cover: “Water Flowers” designed for Softimage Co. by Me Company, using SOFTIMAGE|XSI.

  • On xsibase I found this quote from Gareth Morgan (Senior Product Manager, Softimage):

    “We’re really proud of the new symbol. Yes, of course – it was 100% designed and realized in XSI. The amazing designers at Me Company (London, UK)worked with our Creative Director and designed the ‘Water Flower’ exclusively for v.4.0 – it’s a strong, colourful symbol that is easily identifiable, translates from print to screen beautifully, and communicates the vision of our brand for XSI. Me Company designed the Water Flower as model in XSI, and used the lighting and texturing tools in to give the flower it’s look and feel, and then used the advanced rendering capabilities in XSI to output the design.”

  • The “water flower” logo was mentioned in the book More than a Name: An Introduction to Branding:
  • Some info about Me Company:

    Although the majority of Me Company’s output is in two dimensions, the production process involves three, “XSI is our illustration tool of choice,” says Paul. “It’s the way we express our ideas.” The results, which Paul calls ‘hi-res stills’, capture the world of possibilities Paul and his creative allies envision in response to a particular brief. What makes this work is a faith in the value of the creative process itself: “We follow a line that interests us and try hard to push things forward.”

Toggling LUT on and off for the render region


Here’s a simple self-installing plugin that adds a “Toggle LUT” command to the viewport Display menu. You can use this hide/show gamma correction in the render region while you’re working on the lighting of your scene (eg for film work, to toggle between the linear display and the “print space” lut).

To install this plugin, copy the code and save it in a .py file in the Application\Plugins folder of the User location or a workgroup. Then either restart Softimage or use the Plugin Manager to load the new plugin. After the plugin is loaded, you can use File > Keyboard Mapping to assign a shortcut key to the ToggleLut command.

# ToggleLUT
# Initial code generated by Softimage SDK Wizard
# Executed Wed Jun 15 05:51:55 EDT 2011 by blairs
import win32com.client
from win32com.client import constants

null = None
false = 0
true = 1

def XSILoadPlugin( in_reg ):
	in_reg.Author = "blairs"
	in_reg.Name = "ToggleLUT"
	in_reg.Major = 1
	in_reg.Minor = 0

	in_reg.RegisterCommand("ToggleLUT","ToggleLUT")
#	in_reg.RegisterMenu(constants.siMenuVMCameraID,"Camera_Toggle_LUT",false,false)
	in_reg.RegisterMenu(constants.siMenuVMDisplayID,"Display_Toggle_LUT",false,false)
	#RegistrationInsertionPoint - do not remove this line

	return true

def XSIUnloadPlugin( in_reg ):
	strPluginName = in_reg.Name
	return true

def ToggleLUT_Init( in_ctxt ):
	oCmd = in_ctxt.Source
	oCmd.Description = ""
	oCmd.ReturnValue = true

	return true

def ToggleLUT_Execute(  ):

	rr = Application.Preferences.GetPreferenceValue("Display.color_management_render_region")
	Application.Preferences.SetPreferenceValue("Display.color_management_render_region", not(rr) )

	return true

def Display_Toggle_LUT_Init( in_ctxt ):
	oMenu = in_ctxt.Source
	oMenu.AddCommandItem("ToggleLUT","ToggleLUT")
	return true

Raycasting to points on the opposite side of a mesh


Based on a recent thread on the XSI mailing list, here’s a simple example of using raycast to find points on the other side of a mesh.

In a nutshell:

  • Negate the point normal so it points inside the mesh, and use that as the raycast direction.
  • For the start position of the raycast, don’t use the PointPosition (because you’ll just get the same point back as the raycast hit). Instead, move along the normal a bit and use that as the starting point for the raycast.
  • In 2012, you can use the VertexIndex attribute to get the ID of the “opposite” point.

Green points in the viewport???


Now and again a customer will report that they’re getting these green points in the viewport, and they can’t get rid of them.
“Green points” are how “affected points” are displayed in the Shape Manager, but they shouldn’t show up in the viewport.

This usually happens with reference models.
The solution is to clear the Clusters check box in the Delta, and re-load the model.

hat tip: User hamairon on xsibase.